pfSense
pfSense is an open source router software built on FreeBSD.
I've been using pfSense for years and I wanted to do a deep dive into how I use it, and my experience with it. Follow along.
What is pfSense?
pfSense is a router software built on the FreeBSD operating system. It allows advanced functionality with your home or business network. Out of the box, pfSense is configured to protect your network by default.
Why pfSense?
There are many advantages to running this router.
- Cost-Effectiveness: It is free to download and use, removing the need for expensive licensing fees. It can also run on inexpensive hardware or virtual machines, making it suitable for startups and small businesses.
- Flexibility and Customisation: pfSense is easy to customise, offering power and speed depending on the hardware it runs on. Its web-based interface simplifies setup and management, even for novice users.
- Comprehensive Features: pfSense combines the functionalities of a firewall and a router, providing robust security and traffic control. It includes features such as multi-WAN for load balancing and failover, high availability clustering, reverse proxy, automatic connection failover, and bandwidth throttling.
- Open Source: As an open-source platform, pfSense benefits from community-driven development and transparency.
- Extensive Documentation: pfSense has a comprehensive, searchable, and regularly maintained documentation site, offering everything from how-tos to technical documentation.
There is a lot of debate around OPNsense, a fork of pfSense which came about due to dissatisfaction around the direction of pfSense. I continue to use pfSense because:
- I'm very familiar with it, have grown accustomed to it, there are plenty of tutorials for it. There's effort involved in switching to the unfamiliar.
- I use wireguard extensively, which has better performance in pfSense compared to OPNsense. See below video link.

A video from Tom Lawrence explaining why he uses pfSense over OPNsense
Getting started
If there's one video that I wish was available when I was first getting started using pfSense, it would be one below by Tom Lawrence. It is lengthy, but is well worth your time. His entire channel is an excellent resource.
pfSense getting started guide
To get started you will need hardware to install it on. It is ideal to install this on a spare computer (not a virtual machine). It needs at least 2 network ports. Make sure they are Intel network cards (as opposed to RealTek). You can use an old desktop computer.
It's up to you what hardware you want to run pfSense on. Here are some ideas:
- QotomPC - China based MiniPC. Can be found on AliExpress.
- Protectli - US based MiniPC.
- PC Engines - EU based MiniPC.
- pfSense - buy a unit direct from Netgate, the developers of pfSense. Take a look at their forums for more Hardware ideas.
- Any spare PC with a 2 or 4 port NIC. Look up Intel i340 or i350 on eBay or gumtree and put it into your computer.
As for me, I run pfSense on a Lenovo M720q Tiny, using an Intel i340-T4 network card put into a riser and baffle. I followed this guide below.

It cost me $327AUD excluding the SSD that I had lying around. It has been solid and reliable. I currently have an up-time of 105 days. It never skips a beat, no crashes or glitches.
Alongside having my own pfSense box running community edition, I also maintain a pfSense router (SG-1100) at my parents place which runs pfSense+.
Note, pfSense routers do not generally come with WiFi. This is where you will need to use an existing consumer grade router (I use the Netgear R7000) and switch it to Access Point (AP) mode. Further details below.
How do I use pfSense?
Here's what I've been able to do on my home network with pfSense.
- Connect to a VPN (wireguard) client such as Mullvad, ProtonVPN or IVPN. All devices on the network are tunnelled over the VPN. I've created firewall rules to pick and choose which devices get tunnelled and which don't.
- Host a VPN (wireguard) server to retrieve data from your home network to access it from anywhere in the world.
- Created a wireguard tunnel between my place and my parents. Parents use the tunnel to access my local services (mostly photos). I use the tunnel to send photo backups to an SFTP server hosting at their place.
- Set up a guest network and other subnets for specific use cases. Segregate devices to different networks so certain devices can't access others.
- Inspect data usage of particular devices.
- Monitor traffic download/upload speeds and throttle if necessary
- Set up a fail-over, whereby if the primary internet connection goes down, the secondary connection will automatically kick in.
pfSense has plenty more features to explore and experiment with, such as Captive Portals, HAProxy.
Below is an example home network diagram I have created, that somewhat resembles my current set up at home.
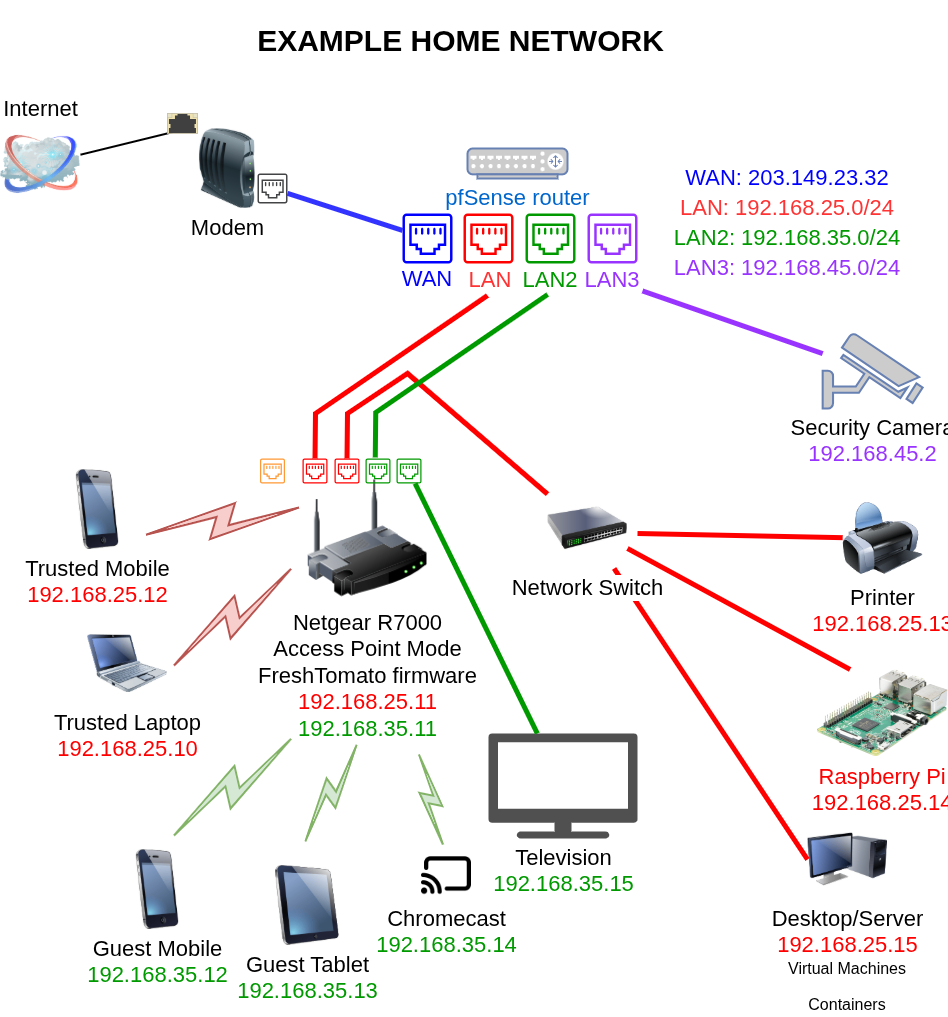
You'll notice the internet coming in to the pfSense router's WAN port from the modem supplied by the ISP, or specifically in my case the National Broadband Network (NBN). pfSense gets supplied with a WAN IP address (for me it's a permanent Static IP address).
Blue represents data from my internet service provider (WAN - Static IP provided by ISP)
Red represents data on my trusted network (LAN - 192.168.25.0/24)
Green represents data on my guest network (LAN2 - 192.168.35.0/24)
Purple represents data on security camera network (LAN3 - 192.168.45.0/24)
From the pfSense router, there's a red ethernet cable going into the Access Point, in this example the Netgear R7000. This is what then broadcasts the WiFi signal throughout the home, connecting my phone and laptop to the trusted network. There's also another red ethernet cable running to a network switch, which allows me to expand the network and plug in various devices (in this case, a raspberry pi, printer and desktop/sever).
The same principle applies again, but for a guest network coloured in green. When connected to the green (guest) network, devices cannot access devices on the red (trusted) network. This is applied through firewall rules that I have created in pfSense. Same again for the purple security camera network.
My experience using pfSense
I'm not going to lie. This has been incredibly technical and difficult to achieve. I have spent hundreds of hours trying to configure and setup my network just the way I want it. Lots of trial and error, lots of digging through forums and documentation. I've learned a lot about wireguard tunnels, DNS leaks, firewall rules, remote access, VLANs and more. It has been a long, difficult journey. I find computer networks to be the most difficult part of IT, and I haven't even explored IPv6 (and at this point, I don't think I want to).
The software itself has been reliable and rock solid once set up, but this isn't for the faint of heart. It requires a working knowledge of how networks work. Basic functionalities are great right out of the box, but if you want to level up, it's not easy.
A hot tip I have found. If you get something working the way you want, make a backup of the pfsense config before moving on to another goal.
Another hot tip when you're just starting out - there's a package in the Package Manager called "System_Patches" - be sure to install this package, and run all the patches on your fresh install to get the latest security updates and fixes.
Alternative to pfSense
pfSense isn't easy, and it requires 2 devices - the router itself and an access point for WiFi. There is one alternative that I would recommend if you want an all-in-one fully featured device for your home network. It comes with wireguard client, wireguard server, built in WiFi, ability to create guest network, and is a low powered device. It's the GL.iNet Flint2 router. It uses OpenWrt, which is another open source firmware. However, on the Flint2, GL.iNet have included some closed source blobs that sit on top to make the user interface more intuitive. You can find it available on Amazon for purchase. I think there's a Flint3 coming out soon, too.
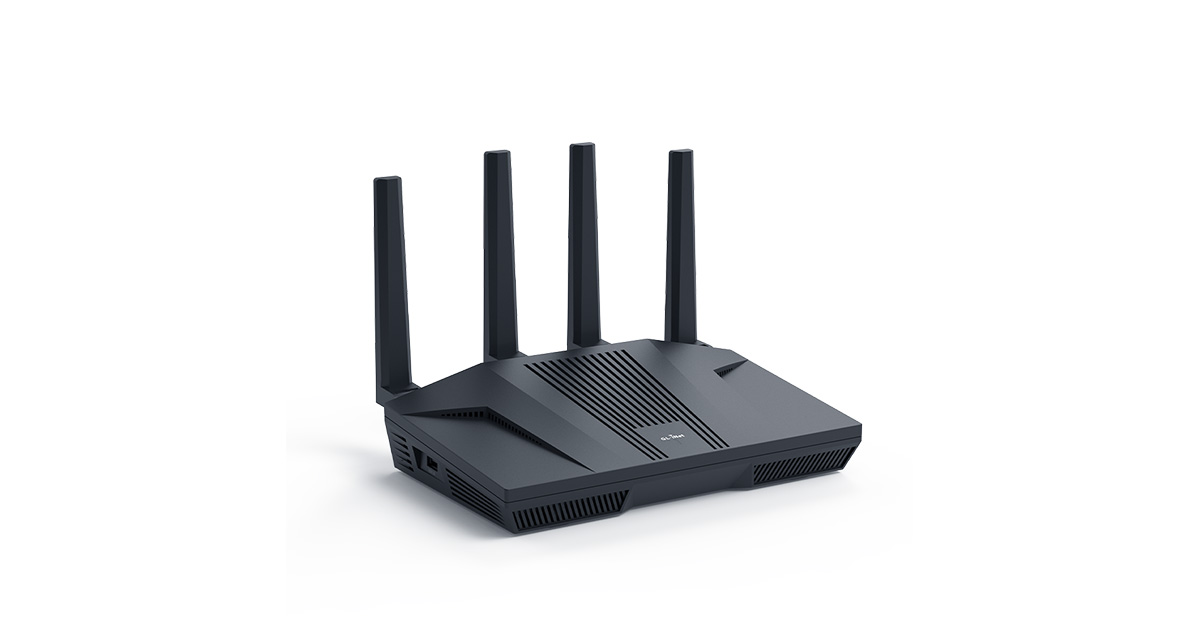
An alternative, easy to use router built on top of OpenWrt.
Conclusion
pfSense is incredible software that has been around for many years. I have loved working with the interface, it's been a solid, reliable option for both myself and my parents' home network. I will continue to use this software for many years to come to enhance my family's privacy and security when using the internet.
I've shared some resources below if you're interested in trying out pfSense.