3D Printed Server Rack
I 3D printed a 10" server rack.

I'm exploring what can be made with the new 3D printer I bought last month. I've been wanting to build myself a mini server rack for all my network and self hosting equipment. The existing situation is rather cluttered, disjointed and unorganised.
I decided to 3D print a 10" server rack to solve the problem.
And here's the final result.
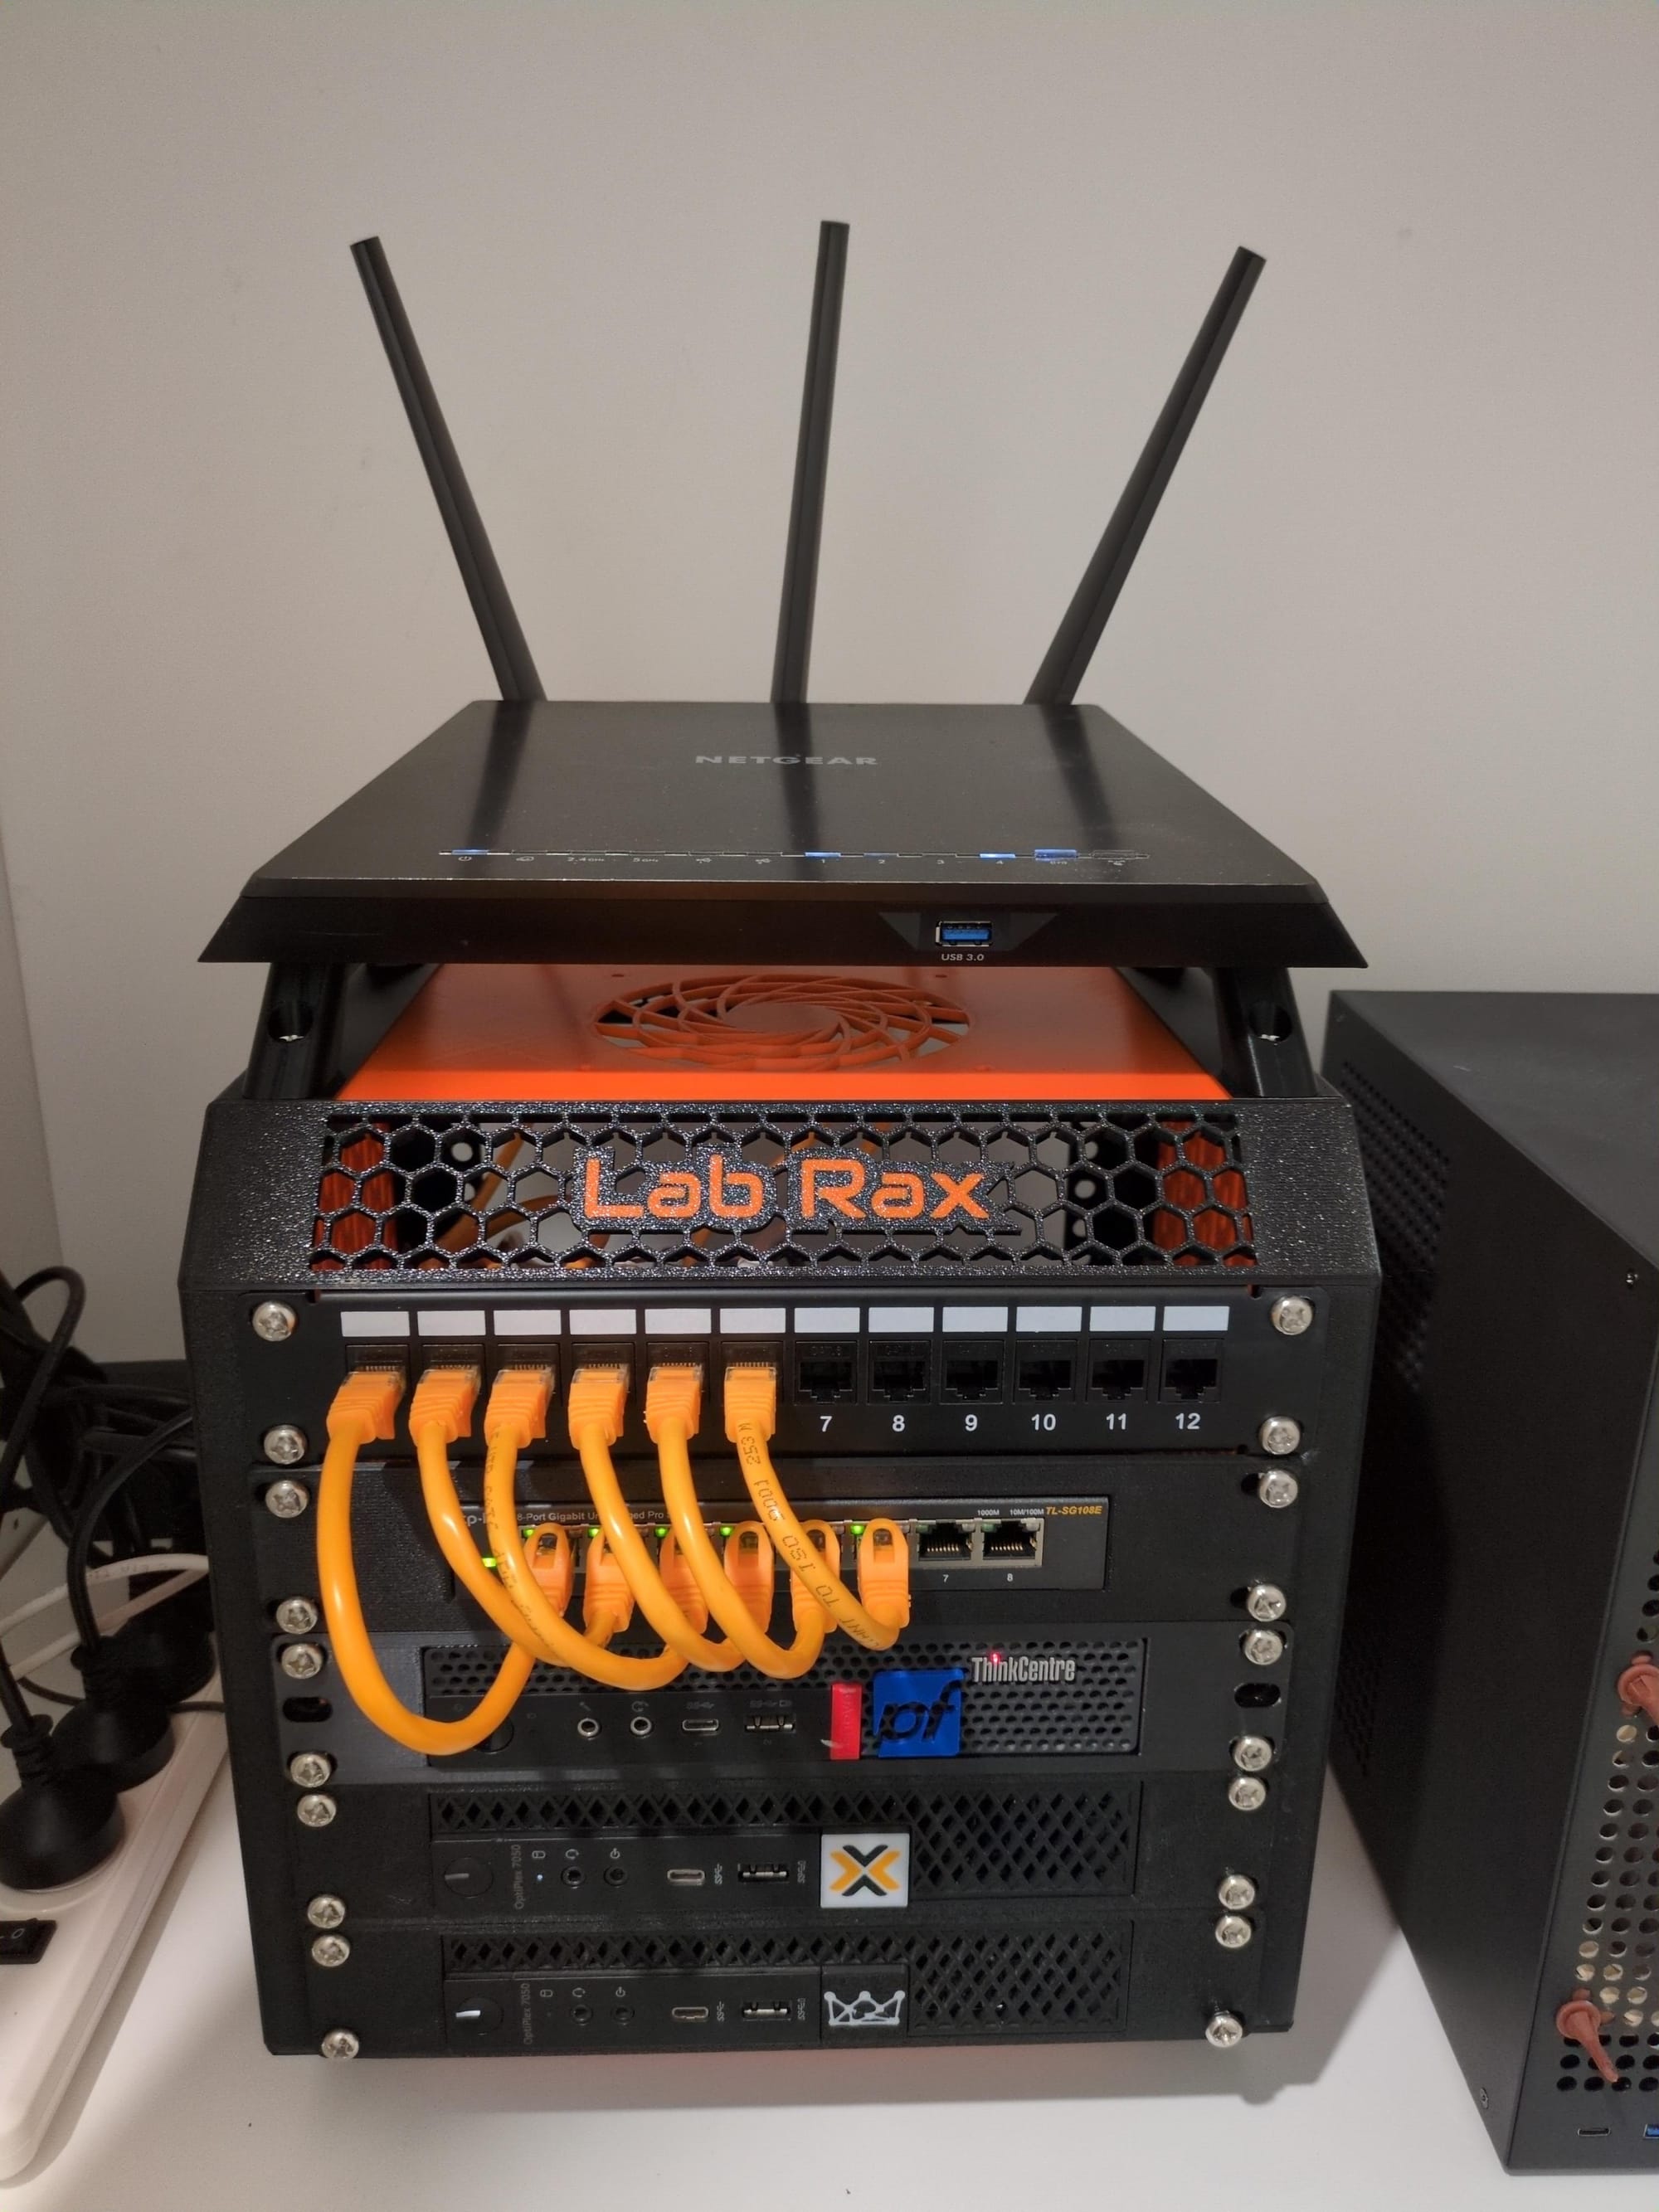
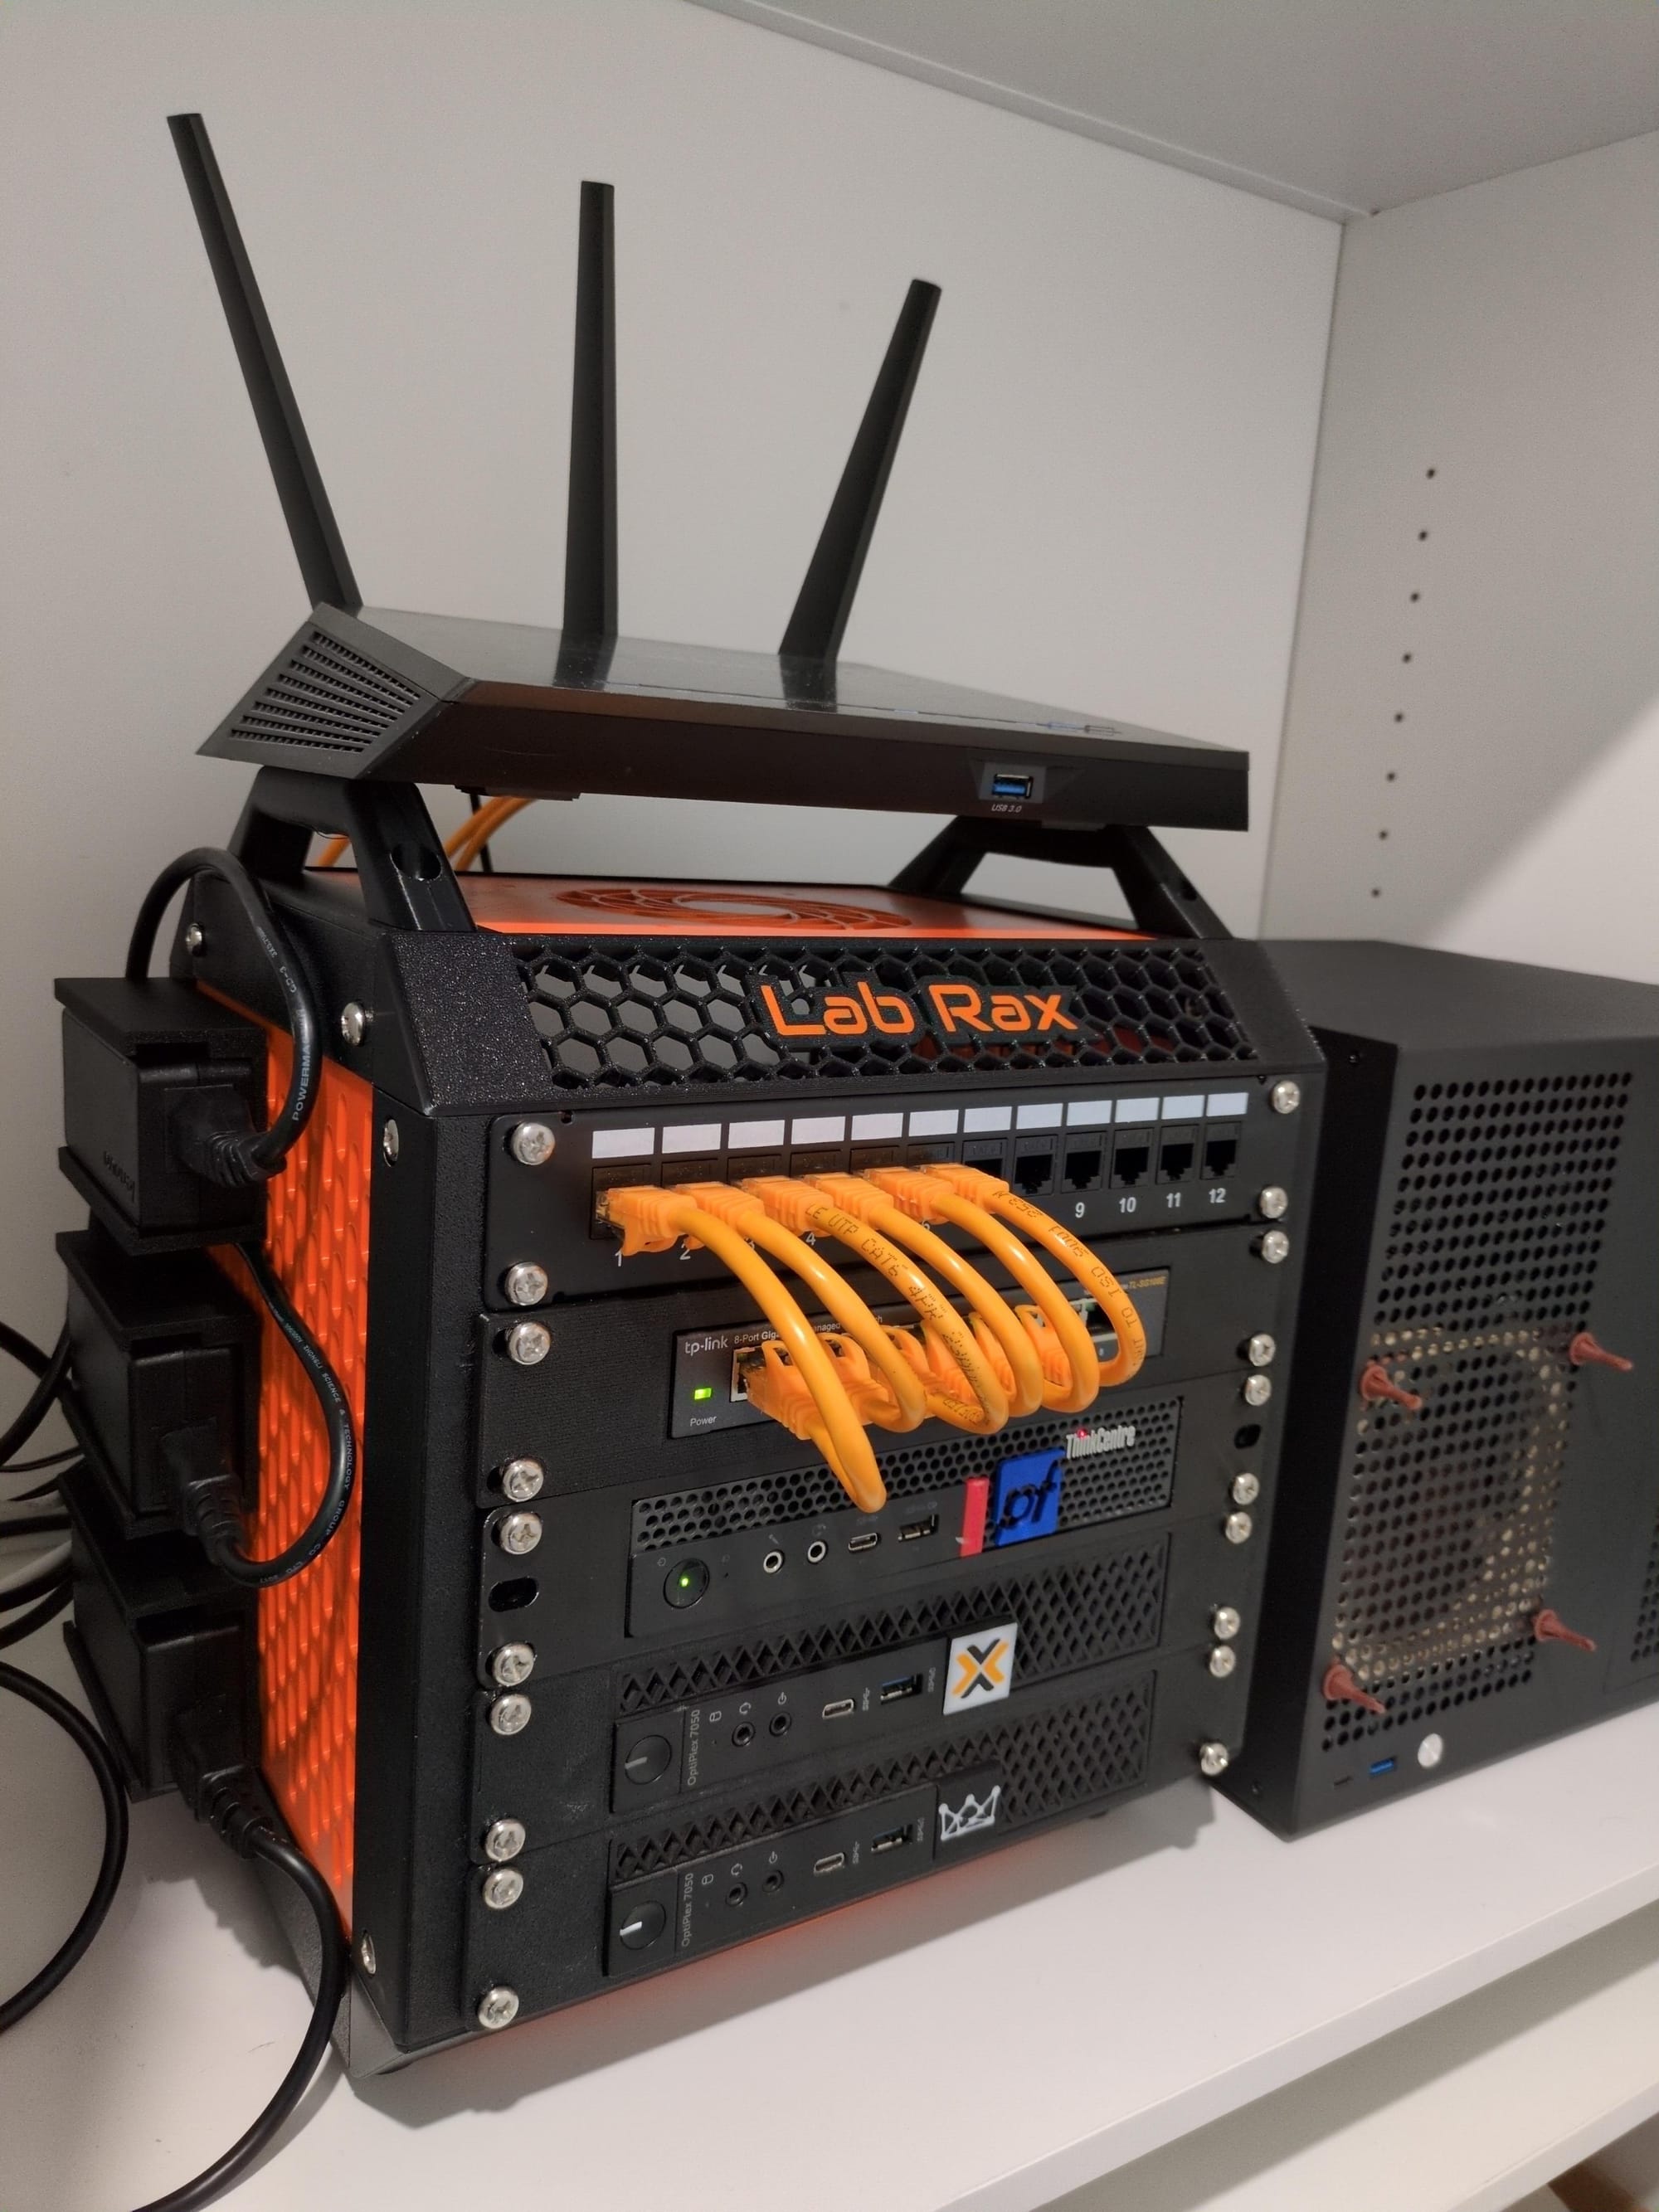
Lab Rax: A 3D Printed 10" Server Rack
I think it came out really well. It's super tidy from the front and back, with the power adaptor bricks mounted to the side.
3D printed parts
Here are all the 3D printed models I used to build this out.
| Model | Filament | Description | Link |
|---|---|---|---|
| Lab Rax (Bolt version) | 707g | All plates except for sides | Link |
| Skadis ventilation sides (x2) | 142g | Skadis side panel | Link |
| Rack panel for Network Switch | 90g | Bracket for TL-SG108E | Link |
| Rack panel for Lenovo Thinkcenter | 132g | Bracket for pfsense router | Link |
| Rack panel for Dell Optiplex Micro (x2) | 366g | Bracket for 2 dell optiplex | Link |
| Skadis mount for power adapter (x3) | 118g | Side mount | Link |
I decided to go with Lab Rax (bolt version) mostly for its aesthetically pleasing design and ease with which it can be put together. I went with a black and orange theme for this build. I used PETG filament type for its heat resistance, given the equipment could run a little hot and is going to be kept powered on 24/7.
For the side panels, I opted to use the Skadis sides instead of the original Lab Rax ones so I could mount the power bricks, utilities and other accessories to the side of it at a later stage. It also comes with the added bonus of better ventilation due to the holes.
All up, this print came to around $30AUD in filament, with a total print time of ~47 hours.
Hardware for the rack
The hardware required to put this rack together included:
- M6 nuts
- M6x12mm screws
I ordered these off eBay for $25AUD which came with 50 screws and 50 nuts. I didn't use all of them, but most of them. 10 spares left.
I used super glue to glue the nuts into the 3D printed nut inserts. This makes it easier to assemble and load up brackets.
$55AUD for a 10" server rack is not a bad deal. I had a look around on eBay and you'd be spending at least $150AUD on getting something similar, but admittedly, you'd get a few extra nice-to-have features.
Other costs
I wanted a patch panel for cleaner cable management. I ordered a 10" coupler patch panel off eBay. This was $55AUD. I could have opted to 3D print the patch panel and insert keystones, but the cost saving was marginal.
I also needed some short 15cm ethernet cables that go from the switch to the patch panel. I got 12 of them. These came to around $45AUD, but didn't use all of them. I needed some 50cm ethernet cables for the back, but I already had those lying around.
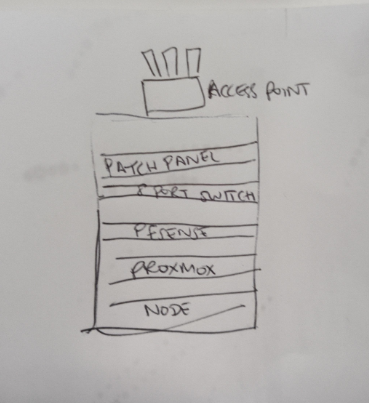
Contents of the rack
Starting from top to bottom, the server rack contains:
| Item | Hardware | Operating System |
|---|---|---|
| WiFi Access Point | Netgear R7000 | FreshTomato |
| Patch panel | Link | N/A |
| 8 Port Network Switch | TP-Link SG108E | N/A |
| Router | Lenovo Thinkcenter m720q | pfSense |
| Server | Dell Optiplex 7050 Micro | Proxmox |
| Bitcoin Node | Dell Optiplex 7050 Micro | Ubuntu |
Assembly and working with the rack
Putting together the frame of the rack was rather straight forward and intuitive. The pieces all fell into place and lined up nicely. Each device slid perfectly into its respective mounting bracket. There was good access to route cables with plenty of room available. I went in with a back of an envelope type plan and it turned out exactly how I wanted it.
Conclusion
I'm impressed with how this project turned out. The rack feels sturdy, keeps all my gear in one neat and tidy place and was relatively inexpensive to build. The top panel has room for a 120mm fan which I may look into installing at a later date. The Lab Rax can be extended further to add more rack units, but for me 5U is just the right number.
I'm very happy with the final results and to have all my equipment it one small place.